Tuesday, August 27, 2013

Week 4 - Tuesday: Recipe Challenge #4

Sometimes, the best way to come up with a good challenge for yourself is to just name 3 or 4 page elements off the top of your head and go from there. That's how I (Emily) came up with this month's recipe challenge - I wasn't even in my room with my supplies, so I had no visual cues.

The recipe: 3 patterned papers, background stamping, a punched shape, and your handwriting.

Emily's pages: For this challenge, I want to share a spread from the mini-album I made for last March's edition of 30 Days of Lists (which is an amazing creative challenge that is running again next month!) that I recently completed. Both pages showcase my handwriting, which I love including on projects. The page on the left features a background I created using two individual arrow stamps in a repeating pattern, and the circle holding the number was created with my trusty 1 inch circle punch. The page on the right is one of my favorite uses of multiple patterned papers on one page, and I did the stamping at the top and bottom by using just the edge of a larger background stamp.


Katie's card: I thought today's recipe would work perfectly for a card. I used my chevron background stamp on the base of the card, layered a few patterned papers, added my punch out on top and then use my handwriting for the sentiment. Perfect! I also added a few gems for some bling. :)


Friday, August 23, 2013

Week 3 - Freebie Friday #9

For this week's freebie, I (Emily) went with something pretty relevant to my own life at the moment - "back to school" themed filler cards for Project Life! I designed them with a variety of phrases so that they'll be useful whether you're a parent sending a kid back to school or off to college, or a student yourself.


Click here to download this week's freebie - 3x4 filler cards

I'd love to see if you use these! They're pretty simple, so there's a lot of room for customization. (Oh, and if you're wondering, the font used in these is called Type Me Two and can be downloaded here on DaFont.com.)

Thursday, August 22, 2013

Week 3- Thursday: Scraplift Challenge #5

I (Katie) loved the way JenKinkade cut up an 8x8" photo into 4 squares on her layout, so I chose it for today's scraplift challenge. You could keep it fairly simple like her layout, or add a bit more embellishing. Either way, we'd love to see how you scraplift this as well.


Katie's Layout: While I really love the one large photo cut up, The photo I wanted to scrapbook wouldn't work for that. So I just created 4 grids of paper and embellishments, with one of them being the photo.
I added a bit of gesso and doodling around my grids to make them stand out a bit.

Tuesday, August 20, 2013

Week 3- Tuesday: Technique Challenge #4

Today, we have a couple of hand-lettering techniques to share with you! Hand-lettering a title, a phrase or a sentiment is a great way to add custom, unique flair to your projects.

Katie's Card: This isn't really a brand new technique, I saw it in a magazine years ago but I love using it. I created a DIY for you guys. After I had written out my sentiment, I colored in between the waves with watercolor pencils, and I think the overall effect is cute and whimsical. :)

 Step 1. Draw wavy lines of your paper.
 2. Write your sentiment or journaling in between the wavy lines, extending and shrinking the size of your letters as you go.

Emily's Project Life cards: I love Katie's DIY, but I wanted to share an example of my own style of hand-lettering for some additional inspiration. I recently started Project Life and I knew from the get-go that I wanted to make sure I used a lot of my own handwriting and hand-lettering in my spreads. This challenge came at the perfect time - I whipped up a couple of cards for the spread I'm working on right now. This style of hand-lettering is based on my regular handwriting with a bit of extra flair. Once I have photos printed for this spread, I'm going to add coordinating color to these cards with watercolors.


Today's challenge is to add hand-lettering to a project of yours. You can use one of the styles we've shared or come up with your own! For additional inspiration, please check out some of our favorite hand-letter-ers: Molly Frances Porter, Kal Barteski, Suzy Plantamura.

Friday, August 16, 2013

Featured Projects!

TGIF! Every Friday we feature projects linked up to our challenges that we think are amazing.

Featured layout from the Recipe Challenge:
by Julie

Featured Layout from the Bonus Challenge:

By Laura

Featured Layout from the Layout Sketch Challenge:

by Vernon


Thursday, August 15, 2013

Week 2- Thursday: Card Sketch Challenge #5

There are a lot of different ways you could alter today's card sketch. I was originally thinking patterned paper for the rectangles and a heart stickers,with bling or sequins. You could change the heart to and shape, or embellishment, change the circles to buttons, etc! You could even turn it vertical.

Katie's Card: I followed the sketch pretty close, I used a block of patterned paper and strip of washi for my background and cut out a heart from paper. I used bling, stamped on my sentiment and then also added a little puppy diecut.

Emily's Card: I also followed the sketch pretty closely! I used another strip of paper for the bottom instead of washi and I substituted some little heart stamps for the bling, though. All this paper came from one of those giant stacks of thin papers (from My Mind's Eye). I know people tend to avoid those, but let me tell you, they're great for cards because there are so many coordinating combinations, the papers are easy to layer without much bulk, and there's enough of each pattern that you could easily mass produce a certain card if you wanted.

Tuesday, August 13, 2013

Week 2 - Tuesday: Inspired By... Challenge #5

I (Emily) chose the image for this week's Inspired By... Challenge from my Words Pinterest Board:


image by Beverly Ealdama


Emily's Art Journal Page: I loved the watercolor background in the inspiration image, and I love working with watercolors in my journal, so I started by putting down a layer of blues and greens. Then I did some hand-lettering and added a doodled border with a white gel pen.


Katie's Art Journal Page: I had every intention of doing a scrapbook layout for this challenge, but my computer was having issues so I couldn't print out any photos. I went for an art journal page instead.
I layered washi tape with watercolor pencils, then doodled with a white marker.


Friday, August 9, 2013

Week 1- Freebie Friday #8

We offer free downloads every other Friday, which you can find here

Today's freebie is by Katie. I had the idea to design digital "flair" the other day. I'd never done it, but after a bit of researching and experimenting I created some! You could use these digitally or print them and cut them out.

Also, if you use these or any of our other freebies on a project, we would l-o-v-e to see it. 

Click here to download today's freebie- Digital Camera Flair.

Thursday, August 8, 2013

Week 1- Thursday: Color Challenge #5

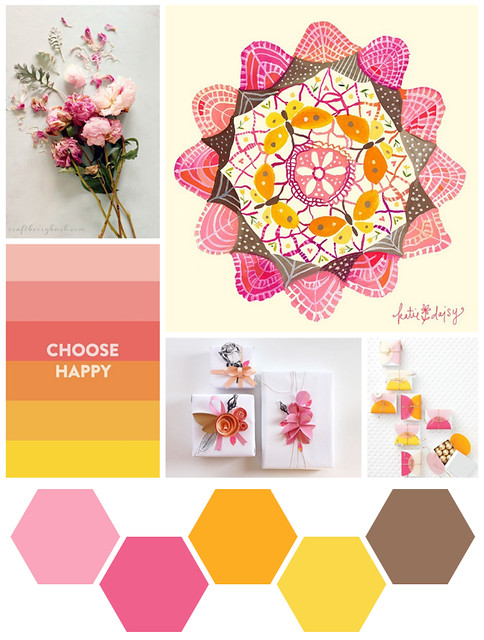
Even though I (Emily) haven't been able to do any crafting this week, due to my job and moving, I did take a bit out of my schedule yesterday to choose a fun color scheme for today's challenge.


Katie's Project: I made an art journal page instead of a layout for today's challenge. I wanted a fun and easy project and I already had these gelli prints laying around. So I cut them up and collaged them down, did a bit of stamping and writing and I was pretty much done. :)


Tuesday, August 6, 2013

Week 1- Tuesday: Layout Sketch #5

When I (Katie) designed this weeks sketch I was picturing washi tape, but you could just as easily use patterned paper, ribbon, etc for the strips. Here is today's layout sketch:


Katie's Layout: I got some neon green washi tape from Downtown Tape (which if you need to stock up on washi, Downtown tape sells washi for less than $2.00 a roll!) and layered it in strips above and below my photo. I felt like the left side of my layout was a bit empty, so I added a patterned paper banner along the side.


A note from Emily: I'm finishing my summer job and moving into my home for the school year this week, so I won't have any projects to share today or Thursday. But I'll be back next week for sure!

Friday, August 2, 2013

Featured Projects!

It's Friday!! Here are a few projects entered in our challenges that we think are awesome.

Featured project from the Card Challenge:

by Laura

Featured Project from the Inspired By Challenge:


by Vernon

Featured Project from the Technique Challenge:


By Julie

We hope you have an awesome weekend!

Thursday, August 1, 2013

Week 4- Thursday: Bonus Challenge

The bonus challenge today: Use song lyrics on a page. It can be any song you like, just whatever speaks to you, or goes perfectly with your photo!

Katie's Layout: I used lyrics from the song "White and Nerdy" by Weird Al. I'm super white and super nerdy, so this layout came together pretty easy. I used a photo of the stack of books I have to read, they're pretty much all Star Trek. Going with that theme, I used nerd papers from DCWV Generation Tech stack, and a piece of paper I had with rocket ships on it.


Tuesday, July 30, 2013

Week 4- Tuesday: Recipe Challenge #3

This months recipe challenge is a fun one. While I (Katie) was deciding what the recipe would be this time, I was staring at my supplies and my eye fell on my stash of markers. I knew I had to add those into the challenge, everyone has markers. They could be scrapbooking markers like Stamping Pens, or permanent markers like Sharpies.

The recipe: Markers, Ribbon, a Tag and the color Green.

Katie's Layout: For my layout I trimmed a bit off of each side of my white cardstock and mounted it on a fun patterned paper. That way I get the pattern, but it's not overwhelming. I doodled my title and then colored in my letters in varying shades of yellow making them "ombre", which I think is a cool look.


Emily's Layout: 
I decided to go digital for this layout, because I wanted to use a photo I haven't had printed yet (and I wasn't feeling well one night but wanted to get some scrapping done anyway - I can do digi in bed!). I had a lot of fun re-creating markers and ribbon in a digital format. I used a font called Instant Marker for the title. The velvet texture on the ribbon came from here and the tags are freebies from Pugly Pixel.

Friday, July 26, 2013

Week 3 - Freebie Friday #7

We offer free downloads every other Friday, which you can find here.

Today's freebie is by Emily.
We've been doing a lot of templates and worksheets here lately, but I just find things like these so useful on the less crafty side of scrapbooking! Last week, I found myself wishing I had a chart I could write each completed layout on, so that I could keep track of what I finished and whether or not I had blogged about each one. I thought that might be useful for our readers, too!


DOWNLOAD THE CHECK LIST HERE

Thursday, July 25, 2013

Week 3 - Thursday: Scraplift Challenge #4

For our 4th scraplift challenge, we're switching it up a little. Katie and I (Emily) decided to have some fun and scraplift each other! Take a look at the layouts we chose and then pick either one to scraplift yourself to enter the challenge.

Emily's choice: I chose this layout of Katie's because I loved what she did with the patterned paper behind her photo and I wanted to try something similar.


Emily's layout: I had a perfect photo for this layout, but then I had to make a quick trip to Michaels for a single sheet of patterned paper because I had absolutely nothing in a dark enough shade of blue or black to work with! Once I got the paper, though, this layout came together pretty easily. I decided to add stitching to the sunburst, which took awhile to do but was totally worth it for the extra detail and texture it added.


Katie's Layout: After looking through Emily's blog, I decided to scraplift this layout. Emily's layout was actually inspired by Shimelle's Starting Point. (Which if you've never been to Shimelle's blog, you totally should!)


I really loved the square photo, as well as the layering of papers behind it. I chose to use a picture of my Minion shoes, and then also used "minion colors" for my layout, which just meant bright blues and yellows. I also threw in a few pops of red washi tape.

We hope you're inspired by our layouts this week and we can't wait to see your take on one of our layouts!

Tuesday, July 23, 2013

Week 3 - Tuesday: Technique Challenge #3 - Stamp Masking

Time for another technique challenge! This time, we'll be doing some masking with stamps to create a completely flat card that still has some dimension to it.

Here's what you'll need:
  • a sentiment stamp
  • a background stamp
  • accent stamps
  • Versamark ink
  • black ink
  • scrap paper
  • removable adhesive


1. Stamp your sentiment on a piece of scrap paper and cut it out.


2. Place the cut-out on your card front where you want it to be and stick it down with removable adhesive.


3. Stamp your background stamp across the whole card front using Versamark ink.


4. Add accent stamps in black ink.


5. Peel off the scrap paper and stamp your sentiment in black ink in the space it left, and that's it!

This technique can be used to create simple but dimensional cards and many other projects! Masking is an easy way to get even more versatility out of your stamp stash.

Katie's card: I love Emily's masking technique, so for my card I used a sentiment stamp (by American Crafts) and Hexagon Stamps (by Inspired By Stamping) to create my card. I love these hexagon stamps,there is the outline stamp and also designs you can stamp inside. I chose to stamp a few in color to add a bit more eye candy. :)


Friday, July 19, 2013

Featured Projects

Happy Friday, paper lovers! Here's a bit of inspiration from our wonderful challenge-takers:

Featured layout from the Recipe Challenge:


by Julie Thibodeau

Featured layout from the Bonus Challenge:


by Laura

Featured layout from the Layout Sketch Challenge:


by Saskia

Featured layout from the Color Scheme Challenge:


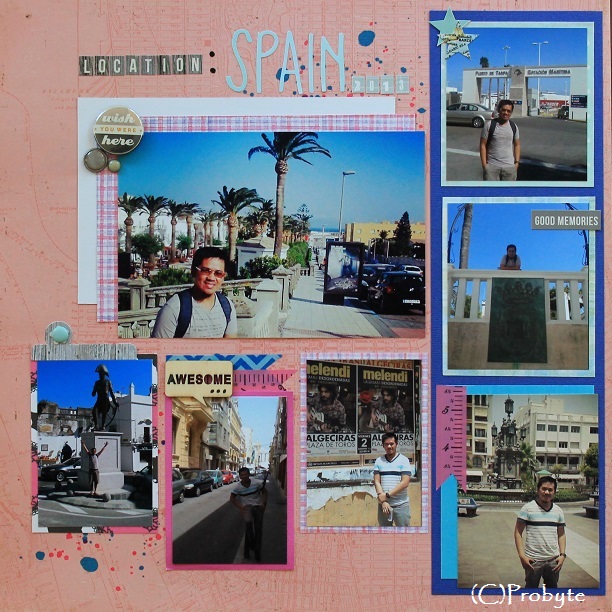
by Probyte

And here's the winner of the Find Your Voice prize pack giveaway included in the Bonus Challenge: a Rafflecopter giveaway Congratulations to the winner and thank you to everyone who entered! We hope to have more awesome giveaways like this in the future. Please keep supporting us by entering our challenges and telling your creative friends about us!

Thursday, July 18, 2013

Week 2 - Thursday: Card Sketch Challenge #4

When I (Emily) designed this sketch and sent it to Katie, we agreed that it's a very versatile one. I think it can be a great use of scraps, and Katie suggested that it might be fun to create the stripes using washi tape.


Emily's card: I created this card with 7 1x6 inch papers from My Mind's Eye and a border punch I've been wanting to try out since I found it at a resale shop for $3. It's quite simple but I love the color combinations and the dimension that comes from the punched edges.


Katie's Card: I love the little borders that American Crafts has along the bottom edge of their papers. I've been trimming them off and saving them for a fun project. I thought about using washi tape, but then I decided this would be the perfect opportunity to use these little strips of paper.


 Link up your project using this sketch by August 1st!

Tuesday, July 16, 2013

Week 2- Tuesday: Inspired By... Challenge #4

This weeks Inspired By... image was chosen by Katie. I've actually had this image pinned for years. I love reading and books and things organized by color, so of course I love this bookcase. I decided to use it for today's inspiration post. Whether you're inspired by the books, the colors or something else I hope you join us!

 via pinterest.

Katie's Layout: My mom just finished working on a quilt that was rainbow, which meant that there were these nice rainbow fabric scraps laying around. I decided to use them as part of my background. I stitched the fabric down and then my photo as well. When I was sewing down my photo is shifted so it's a bit crooked but it doesn't bother me too much. ;)


Emily's Art Journal Page: I loved the piece Katie chose to inspire us this week, but I found myself with a bad case of scrapper's block when I sat down to make a layout for this challenge. So I changed course a little bit and decided to pull out my art journal and do a simple page to try out some new paints and work on my painted script.