Tuesday, April 30, 2013

Recipe Challenge #1

4 Product Recipe Challenge

Hi! We’re Megan and Allie from Document Life Workshop and today we’re here to challenge you to use a 4 Product Recipe to make a project! Stretch your creativity and get an amazing result with these four ingredients: washi tape, watercolors, Project Life style cards, and a hammer!

Homemade Recipe Book using Document Life Workshop Recipe Template Set by Megan Anderson

 And because it’s a recipe challenge, we're giving away a Recipe Template Set, which you can find in our store. You can check out what Megan did with the recipe template set here.

Megan’s Take: Recipe Challenge | Megan's Take

I'm using this layout as half of a Project Life spread, so I wanted it to be simple while still highlighting a life changing event: my brother-in-law coming to live with us (this was back in 2011). Using the recipe with an enlarged photo made making a simple page that packs a punch super easy! I used watercolors to make a strip of my own patterned paper. I stole them from my seven-year-old daughter; don't rat me out! I wanted to pick up the cool colors in the photo while making the page feel happy, so I mixed yellow, blue, and green. I think using watercolors is pretty addicting, I might have to do it more often! I used a Project Life card as a journaling spot - they're not just limited to pocketed page protectors. Washi tape added more color and texture, giving a home to my title. And I hammered on a few snaps I've been holding onto since my earliest scrapbooking days. I actually love this product challenge so much that I think I'm going to do another one later in the week! I'll make sure to leave a link in the comments if that actually happens. See a few close-ups of this layout along with how this it fits into a Project Life spread here.

Allie’s Take:
  Recipe Challenge | Allie's Take

I chose to take a digital scrapbooking approach to this challenge, but still managed to "stick to the recipe" exactly! For my page, You Add Color To My Life," I started with a neutral kraft base, and then added digital watercolors to the page-- this is very easy to do with Photoshop brushes, or you can even buy pre-made watercolor paper and elements. Digital washi tape is just as much fun to use on pages as physical washi-- and digital tape never runs out of your favorite roll! I used the edge of a "journaling card" with "Happy" written on it for some fun word art--journaling cards are so versatile even outside of Project Life, as embellishments or even as word art! The hardest part of the challenge to do digitally was to "use a hammer," but I thought about elements that you would technically need a hammer for in a physical page, and then use that as a digital item-- and for that I came up with using a stamped metal tag. This challenge was lot of fun to do-- and a lot of fun to interpret a paper challenge into a digital page.

 Megan Anderson is a crafty nerd, aspiring novelist, and avid life documenter. She reads piles of books, loves city life in Kansas City, and blogs about her nerdy family life with her husband Jake at The Nerd Nest. You can also find her at Document Life Workshop, a creative space made to challenge and inspire memory keepers. Get to know Megan better by following her on Twitter and Instagram at @Megan_NerdNest.
Allie Trumpower of Alexandra Rae Design and Document Life Workshop is a crafty designer, a photographer, and is scrapbooking obsessed. She loves great design, memory keeping, pinterest, twitter, and instagram– and loves meeting new people via social media! Follow along with her creative projects and everyday life & sarcasm on twitter and instgram at @abandy.
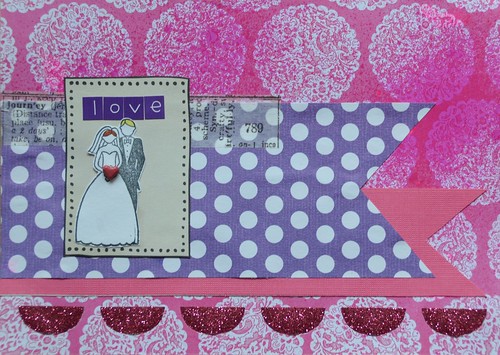
Katie's Take:
I loved the recipe that Megan and Allie chose to work with. I already use watercolors, journaling tags and washi in a lot of my layouts so the trickiest thing for me was the hammer. I wanted to do something out of the ordinary, so I hammered foil around a chipboard bike embellishment I had. The bike originally didn't match my layout, but I like the look of it now.

Emily's Take:


As soon as I saw that this recipe included journaling cards, I went straight for my Smash pads! I have a couple, but because I don't really do Project Life and my Smash books are both (sadly) at my mom's house, I don't get much use out of them. I paired up a list of the books I'd like to read this summer with a photo I took very sneakily during one of my many English classes last year. I used some of the very watercolor-inspired Amy Tangerine Sketchbook paper and added simple strips of washi to create a visual triangle around my photo and journaling. I was almost stumped on how to use a hammer on my page, but then I remembered the bin of eyelets in my drawer! I used my Crop-o-Dile to set them (a little unsuccessfully, but I'm out of practice), but you can definitely use a hammer if you have one!

GIVEAWAY!

Want to win a set of Recipe Cards from Document Life Workshop? Create a project using this "recipe" and link it below by May 16th to be entered to win!

  • Washi Tape
  • Project Life Style Journal Cards
  • Watercolors
  •  Hammer

Friday, April 26, 2013

Freebie Friday #2: Organizing Your Washi Collection

Here at Paper Lovers Studio, we share a free printable for you to download every other Friday.

Today's download is by Emily:

I wanted to share something a little different, so instead of something you can use on a scrapbook page, I've made up something that will help you keep track of all the washi tape you own! Washi tape is extremely popular at the moment, and I have seen scrappers admitting to owning upwards of 100 rolls sometimes! Personally, I only have about 30, and it's still hard for me to remember what every roll looks like when I'm trying to decide if I want to add some to a page. So I designed a simple chart that will allow you to always have a small sample of each of your tapes at hand, without having to pull out every roll while you're working.


CLICK HERE TO DOWNLOAD THE FREE CHART

How Emily used the chart:
I keep my washi organized by brand, so I printed off three of the charts and filled in the "category" blank with the three brands of tape I own. Then I just stuck down small samples of my tapes into the boxes on the chart and added a few written details (width, color, pattern, if I had multiple rolls, etc). I store my charts in page protectors at the back of my current album.


I think it could also be very useful to print these charts out on transparencies, if you're able to. That way you can actually hold the sheet up to your layout and see how each tape might look on your page!

How Katie used the chart: I loved Emily's idea to sort them by brand but I really don't have enough washi tape to sort mine like that. So, I decided to sort mine by color and wrote in what brand each tape was next to it. I split my washi tape into 2 color schemes- Blues/Greens and Pinks/Reds. This works best for me, I think.

Thursday, April 25, 2013

Inspired By... Challenge #1

It's always interesting when you're able to take an image of something not-scrapbook-related and transfer some element of it onto a scrapbook page or other paper-crafting project. The point of this challenge is to inspire you to do just that! We will provide the inspiration (usually something we found on Pinterest or elsewhere on the Internet) and some sample projects, and then all you have to do is link up a project inspired by whatever it is that inspired us!

This time, the inspiration image is this lovely quilt:


source: Sewing in a Straight Line, Brett Bara

Emily's layout: I treated the quilt like a sketch for a page and used strips of My Mind's Eye paper in place of the quilted stripes. This is a very simple interpretation of the image, but I love how it turned out and I'm really happy to finally have this photo (circa 2011 or 2012) scrapped!


  Katie's layout: I thought the bright colors of the quilt were perfect for the camping photos I had to scrap! I also loved the simple stripes on the quilt, but I wanted to change things up a little bit. I cut strips of green and orange/yellow paper, then I cut them in half and placed them on both sides of my page.
This project was perfect for using up a bunch of mixed matched paper scraps!

Tuesday, April 23, 2013

Technique Challenge #1 Heat Embossed Resist

Today we're going to show you one of many ways to use Gelatos! No, not the ice cream, the amazing pigment sticks named Gelatos by Faber-Castell Design Memory Craft.
What are Gelatos? "Compact acid-free pigment sticks that glide on creamy smooth for vibrant color and coverage." 
They're color in a little chapstick style tube, perfect for paper crafting and mixed media.

There are a lot of different things you can do with gelatos, but we're just going to show you how they resist heat embossed areas and what cool technique it is. But for more ideas, visit the Design Memory Craft blog!
Supplies: Stamps,Embossing Ink, Embossing Powder, Heat Gun, Cardstock, Paint Brush and Water, Gelatos or Watercolors

1. Using your stamps and heat embossing supplies, heat emboss a pattern onto your cardstock.
I used a little doily flower stamp from Amy Tangerine's Yes, Please line and clear embossing powder.
2. Color over your cardstock and embossed images with gelatos. You can use all one color or do multiple colors of gelatos, they blend really well!
 3. With a damp paintbrush, go over your gelatos. You'll notice that the color resists the areas you embossed.
 4. If you need to, wipe away any excess color from your embossed images using a paper towel.

No Gelatos? You can do this with watercolors too. Just emboss your stamped images and paint over them with watercolors! That's what Emily did to make this card:


The technique is just the same, but using watercolors instead of gelatos. It's pretty easy (once you get the hang of embossing) and looks great on cards and other projects. Embossing also resists most spray inks, so if you have any of those in your stash, try them out!

Enter to win some goodies from Design Memory Craft!

Create a project (layout, card or other paper craft) inspired by this technique and link it up here to be entered to win these products:
Stampers Big Brush Pens: Green.
Metallic Gelatos Colors and Stamp
Stampers Big Brush Pen: White
GRIP Trio Sharpener

This challenge and giveaway will close on Thursday, May 2nd.

Friday, April 19, 2013

Featured Layouts!

We are so excited at the response we've received for our first 2 weeks of challenges! We don't have prizes for the challenges yet (there will be one next week so keep an eye out!) but we will be featuring projects from the different challenges every other week!
Here are a few projects we think are fantastic. (Actually we think all of the projects inspired by our challenges are amazing, but we can't feature them all, of course.)

Happy Day by Probyte

Transparency Layout by Taylor

Love by Saskia

Stop back by on Tuesday to see a brand new challenge, technique and the chance to win some goodies!

Thursday, April 18, 2013

Scraplift Challenge #1

We like scraplift challenges because there are so many layouts available online to be inspired by. Isn't this layout by Tina Aszmus so fun and colorful? We found it via the Studio Calico blog and love both the design and that Tina used minimal embellishments, yet her layout looks amazing!


Katie's Layout: I copied Tina's layout almost exactly, but here's what I changed up:
  • I converted it into a 12x12 layout.
  • I used watercolor pencils and gelatos instead of water color crayons to color my speech bubbles.
  • I stamped in a few of my speech bubbles.
  • I added glitter into my speech bubbles, using a bit of glue + white glitter.
  • I doodled my own speech bubbles instead of using a mask/template.

 Just like sketches, scraplifts are an easy way to speed up the design process of a layout! I think this is a really fun design. If you're a clean and simple scrapper and don't like to use paints or messy supplies in you layouts you could easily cut speech bubbles from patterned paper instead of drawing them or you a piece of patterned paper that already has speech bubbles printed on it.
Emily's Layout: I love the layout we chose to scrap-lift for this challenge! It was so much fun to work with. In my layout, I used patterned paper (from Lawn Fawn's first line, Bright Side) for the speech bubbles. I also changed the location of the journaling.


I decided to make a few of my speech bubbles from white card stock to add a tone-on-tone element to the page. I stamped this little rose from the Amy Tangerine Yes, Please clear stamp set in the white bubbles to add some interest to them, and then I popped them up with foam adhesive for dimension and to define them a bit more.


This might seem like a simple layout to lift, but there are so many directions you can take it in! We can't wait to see how you use it.

Link up your projects! We love seeing how you use our challenges to inspire you! This challenge will close on Thursday, May 2nd.

Tuesday, April 16, 2013

Kill a Kit Challenge #1

One of the fun challenges we are doing here on Paper Lovers Studio is the "Kill a Kit" challenge. How does it work?? Simple:

We will be putting together our own kits to use and posting them once a month. The next month, we will post the projects we've made from the previous kit and post our next kit.

We would love to have you join in! Create your own kit and link up your projects!

Katie's Kit:
To make my kit, I started by going through my patterned paper stash and choosing a bunch of sheets that I thought could go well together. I included papers from Nikki Sivils, Amy Tangerine, Dear Lizzy, DCWV and a few others.
For embellishments I am using a couple of sets of Thickers, 1 sheet of chipboard stickers, spirograph stamps, 2 rolls of washi tape and my Amy Tangerine phrase stamp.

I plan on making atleast one layout with this kit and definitely a couple of cards. I love these colors.

Emily's Kit: Most of my paper is already in collection packs or pads, because I find it very easy to work that way. But I still wanted to put together a custom collection of patterns for this challenge, so I pulled together papers from a couple older My Mind's Eye collections as well as some from a Recollections (Michaels' store brand) collection. I picked 9 papers in all, and then added a set of Thickers, a smaller set of alpha stickers, a stamp set from Studio Calico and a larger one from Lawn Fawn, and two rolls of washi. The colors in this kit are very different from what I've been working with lately, so I'm really excited to take on the challenge to get this kit used up!